Chrome extension for loading/saving form data
published: (updated: )
by Harshvardhan J. Pandit
is part of: GNIB Appointments
browser GNIB visa web-dev
recap: In the previous posts, I describe retrieving GNIB and Visa appointments by manually querying the API endpoints that the website uses. In this process, I describe the use of
bash/pythonscripts and a Heroku webapp to display appointments.source: hosted on Github here
webapp: hosted on Heroku here shows available timings for GNIB and Visa appointments
In this post, I describe the workings of a Chrome extension that retrieves GNIB and Visa appointments when the user is present on those pages. The extension also provides a handy toolbar that is rendered on those pages to save and re-populate form data. This helps in filling out the form quickly once an appointment is available.
Extension goals
- Visible icon in the browser extension bar
- Checks appointments every 30mins or so in the background
- Notifies when a new appointment is available
- Allows quickly navigating to booking page
- Fills the form with information previously saved
- Works on both GNIB and Visa appointments
Achievable goals
Out of the listed goals above, few are quite easy (comparitively).
The icon can be made visible in the extension bar with not much effort.
Similarly, the background checks are simple using javascript's
setInterval function. Similarly, notifications can be made using alert
boxes or changing icon on the extension bar. And so on and so forth.
However, one of the kickers in all this was the presence of CORS policy. Which means that I cannot make requests to the API endpoint outside of the GNIB and Visa websites. So no more background queries against those two. So for now, the extension does everything except background checks and notifications.
Chrome Extension structure
The chrome extension documentation can be found with a tutorial that helps get things started pretty quickly.
manifest
The file manifest.json describes the metadata properties of the
extension and is a JSON document that contains a prefixed set of keys.
icon
The icon of the extension is a 128x128 png file. Some free ones can be
obtained here.
popup
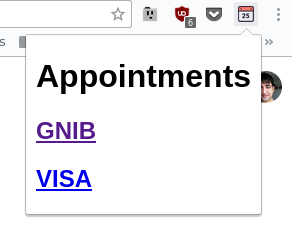
This is the file that is executed when the extension is clicked on. It is a simple HTML file that can contain arbitrary javascript to perform tasks. For our purposes, we add two links for the GNIB and Visa appointment pages.
content scripts
This section describes javascript files that get executed based on the content or URL of the webpage. It allows matching/filtering websites based on URL, and then specifying which files get executed.
"content_scripts": [
    {
        "matches": ["https://burghquayregistrationoffice.inis.gov.ie/Website/AMSREG/AMSRegWeb.nsf/AppSelect?OpenForm"],
        "js": ["jquery.min.js",  "sweetalert2.min.js", "gnib_appointments.js", "gnib_interface.js"],
        "css": ["interface.css", "sweetalert2.min.css"]
    },
    {
        "matches": ["https://reentryvisa.inis.gov.ie/website/INISOA/IOA.nsf/AppointmentSelection?OpenForm"],
        "js": ["jquery.min.js",  "sweetalert2.min.js", "visa_appointments.js", "visa_interface.js"],
        "css": ["interface.css", "sweetalert2.min.css"]
    }
  ]
Out of these, jquery and sweetalert2 are external libraries which I copied because
external requests may not work, or could slow everything down.
jquery allows access to DOM elements and a quick way to perform interactions. sweetalert2 is an utility to create
fancy popup boxes used to notify and for interactions.
The *_appointments.js are responsible for pulling the appointments, and the
*_interface.js are responsible for interacting with the interface.
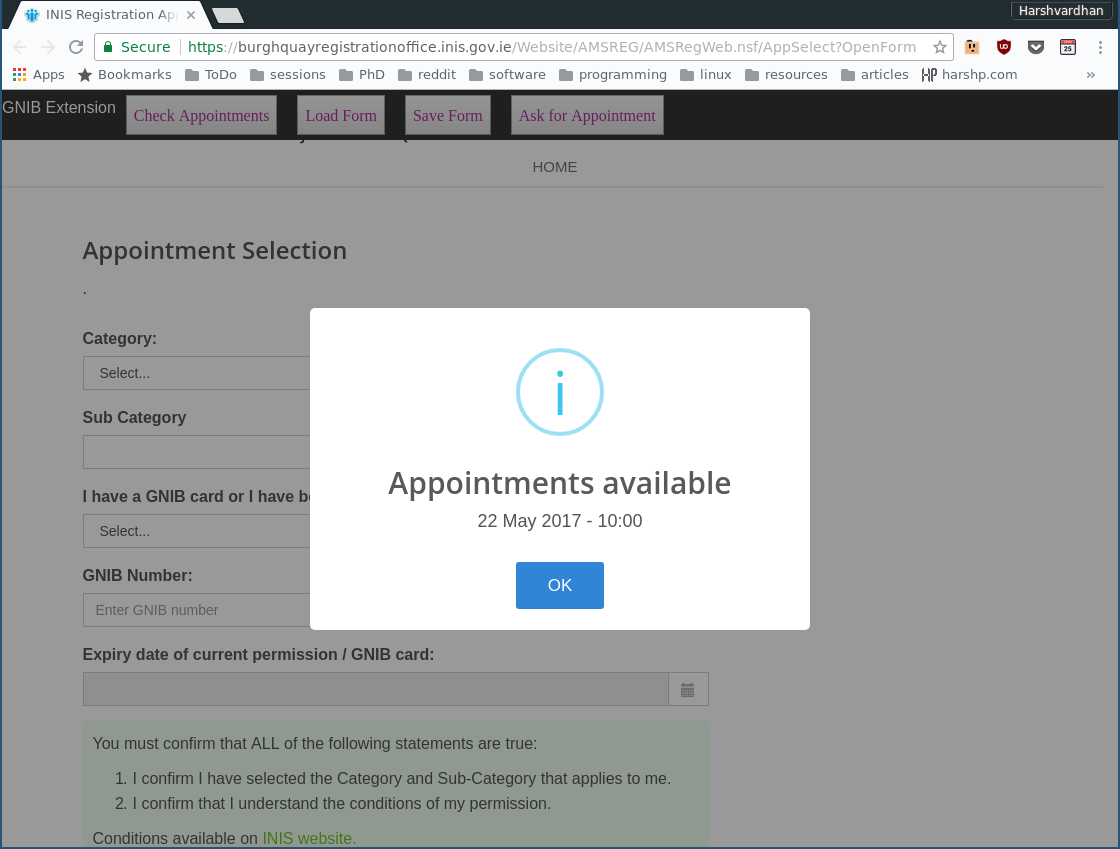
Adding an interface bar on page

The extension adds a bar that sits on top and offers buttons for:
- checking appointments
- loading saved form data
- saving form data
The bar is a simple div attached to the page using jQuery on page ready.
It is fixed at the top so that the user can browse the page with the bar available
as a sort of an interface.
var div = $(
    '<div id="interface-sticky-header">'
    // ... buttons
    +'</div>')
    .appendTo('body');
Checking appointments
This is the same bit of code as covered in previous posts.
Using jQuery's $(document).ready function, we call the check_appointments function
which will load the appointments and show available timings.
Loading and Saving data
Chrome offers a way for extensions to store and sync data using the browser APIS.
This is done via chrome.storage.sync.* methods get and set. Instead of saving
and retrieving individual key-values, we use a single data packet in the form of a
dictionary variable.
// GNIB form fields
var category = $('#Category').val();
var subcategory = $('#SubCategory').val();
var gnib = $('#ConfirmGNIB').val();
var gnib_no = $('#GNIBNo').val();
var gnib_expiry = $('#GNIBExDT').val();
var user_declaration = $('#UsrDeclaration').val();
var given_name = $('#GivenName').val();
var surname = $('#SurName').val();
var dob = $('#DOB').val();
var nationality = $('#Nationality').val();
var email = $('#Email').val();
var email_confirm = $('#EmailConfirm').val();
var family_application = $('#FamAppYN').val();
var passport = $('#PPNoYN').val();
var passport_no = $('#PPNo').val();

chrome.storage.sync.set({
    data: {
        "category": category,
        "subcategory": subcategory,
        "gnib": gnib,
        "gnib_no": gnib_no,
        "gnib_expiry": gnib_expiry,
        "user_declaration": user_declaration,
        "given_name": given_name,
        "surname": surname,
        "dob": dob,
        "nationality": nationality,
        "email": email,
        "email_confirm": email_confirm,
        "family_application": family_application,
        "passport": passport,
        "passport_no": passport_no
    }
});
A good side effect of this is that the common fields between GNIB and Visa forms such as name and passport no are saved with the same identifier. This means that if you have filled a GNIB form before and saved that data, the common fields can be populated in the Visa form with it.