Setting up a Facebook bot to respond with available GNIB/VISA appointments
published: (updated: )
by Harshvardhan J. Pandit
is part of: GNIB Appointments
automation Facebook GNIB visa

recap: in the previous posts, I set up a webapp that displayed the available appointments at https://gnibappt.herokuapp.com/ by making requests to the API for retrieving GNIB and VISA appointments.
source: hosted on Github here
webapp: hosted on Heroku here shows available timings for GNIB and Visa appointments
update: The Facebook bot requires to be reviewed by Facebook before it can be made available publicly. I have submitted the app for review, with reply awaited.
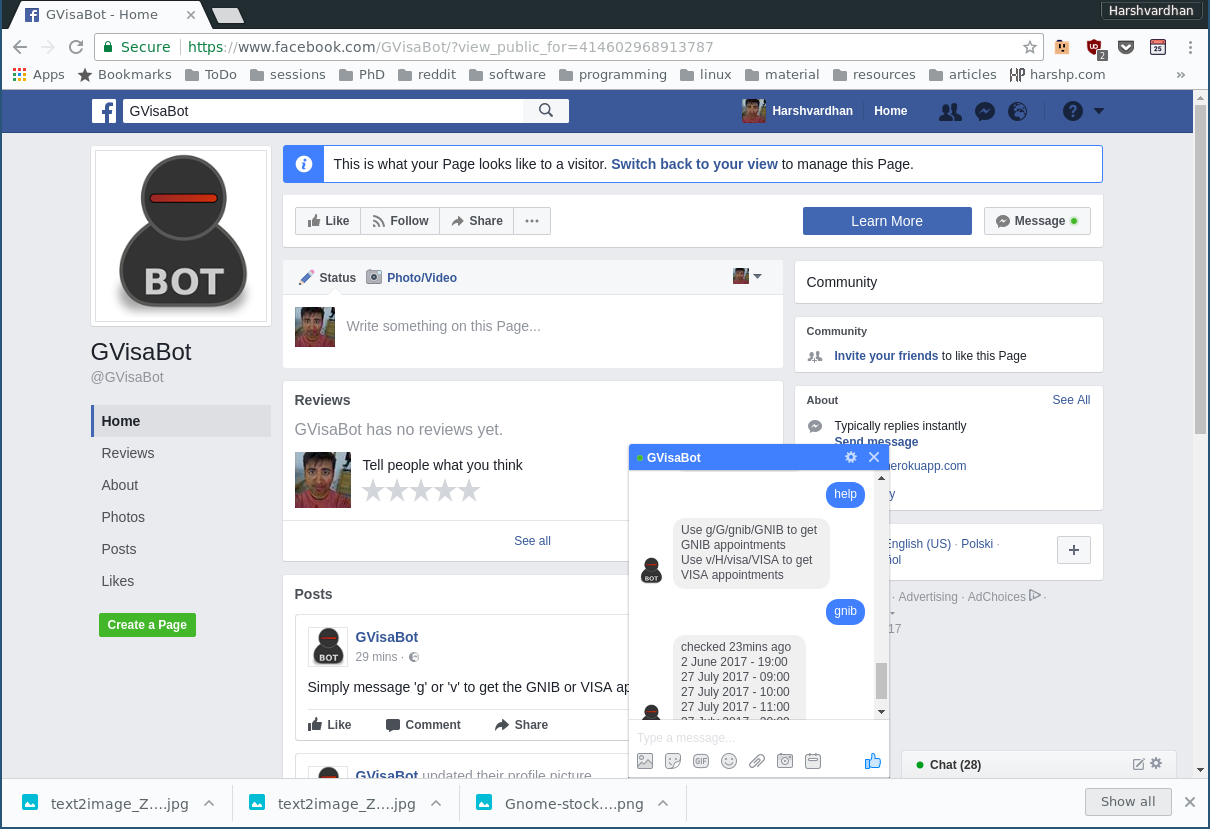
In this post, I explain how I set up a Facebook bot called GVisaBot that responds to texts with available appointments. It is quite easy and free to create a Facebook bot. All it needs is a developer key, and a page, both of which can be created using your existing profile.
How the bot works
Facebook bots and Facebook Pages
Facebook bots are attached or associated with a Facebook Page, and contain a URL which
Facebook uses to communicate with the bot. When the bot is set up, Facebook provides
a PAGE_ACCESS_TOKEN which is used to verify that the bot is allowed to access and
interact on behalf of the page. The second part is the VERIFICATION_TOKEN which
is set by the developer to proof that the responses are coming from a verified party.
Verification
Verification is performed by sending a GET request to the bot URL, which must
return the hub.challenge key only if the verification token sent by the request
is the same one set by the developer. Messages are sent as a POST request to the
URL, with the body containing a specific format that can contain attachements,
locations, images, and everything that can be sent in the Messenger. In this post,
I only focus on the bits related with responding to text messages.
Message Format
The data sent is a JSON string, which may need parsing/converting depending
on the programming language and web framework being used. The data contains
the key entry which is a list, and where each item is a dictionary of which the
value under messaging is of concern.
{
    "entry": [
        {
            "messaging": []
        }
    ]
}
The messaging list contains further dictionaries, each containing one instance of a message
from a sender. The keys message and sender are used to get the text message and reply
back to the sender.
{
    "message": {
        "text": "text of message"
    },
    "sender": {
        "id": "id of sender"
    }
}
Responding back to the sender
Each response back is a POST request made to
https://graph.facebook.com/v2.6/me/messages with the parameters
access_token containing the PAGE_ACCESS_TOKEN and request data hosting
a JSON dump of the form-
{
    "recipient": {
        "id": "sender.id from above"
    },
    "message": {
        "text": "text of response"
    }
}
Setting up the bot
Needless to say, this will require that you have an existing Facebook account.
Note: at this point, the bot must be up and online
- The first step is to select what Facebook Page the bot will be associated with, or create a new one.
- After that, create a new App associated with that Page.
- Under the app dashboard, select add a product and under that select Messenger.
- Select the page, and get the
PAGE_ACCESS_TOKEN - Select webhooks, and give it the URL the bot is hosted at.
- Type in a
VERIFICATION_TOKENthat you used in coding the bot - Select messages under subscriptions.
That's it! Facebook will verify the URL responds with the correct verification token, and then you can use message on the page to interact with the bot.
Responses
Using a simple if-then-else conditional, I programmed the following responses:
if request in ['g', 'G', 'gnib', 'GNIB']:
    return gnib_appointments
elif request in ['v', 'V', 'visa', 'VISA']:
    return visa_appointments
else:
    return 'not valid'
Other ideas
- The same principle can be extended to create services that can respond to texts
- Send an appointment upon request or as soon as it becomes available.
- It can also be used to create Slack bots, or use Pushbullet to get push notifications.